Week 3 Buy Low, Sell High: Where Usage and Points Disagree
We priced every target, carry and red-zone look from Weeks 1 and 2 at what it was worth leaguewide, then found the rostered players scoring furthest from their workload, led by Terry McLaurin. Who is owed points, and who is living on borrowed ones.
Two weeks in is when the trade offers start. Somebody in your league is looking at Terry McLaurin's 10.4 points and wondering whether to cut bait. Somebody else is sure Chuba Hubbard's 3 touchdowns are who he is now. Both of them are reading the least reliable number a week produces.
Here's a better one. We took every target, carry and red-zone opportunity from Weeks 1 and 2, priced each at what that kind of touch was actually worth across the league at that position, and added it up. That's what an average player would have scored with the same workload. Then we lined it up against what each player really scored. Where the two disagree by a lot, bet on the workload. Offenses keep feeding the players they're feeding. They don't keep throwing 60-yard touchdowns to the same guy.
What one opportunity was worth, Weeks 1 and 2 (PPR points)
The red-zone numbers are why touchdowns fool people. A receiver's look inside the 20 turned into a score 46% of the time; a back's carry there, 19%. A few of those bouncing one way or the other swings a two-week total by 10 points or more.
Buy low: the workload is there, the points aren't yet
Terry McLaurin leads the list. 13 of 63 targets (21%), 2 red-zone looks, and on the field for 79% of snaps. An average wide receiver turns that into 24.7 points. He has 10.4. Most of the gap is catches and yards that didn't come, which is the part a player controls most, so check the tape before you pay full price.
20 rostered players are at least 3 points a game behind their workload over Weeks 1 and 2. 7 of the top 8 haven't scored a touchdown yet. That's the buying window: a manager looking at the box score sees a bust, and you're looking at a role.

Terry McLaurinWRWASQYards owed
10.4 PPR points on 24.7 expected · 0 TD on 0.9 expected
13 of 63 targets (21%) · 2 red-zone looks · 79% of snaps · drafted Rd 5

DK MetcalfWRPITYards owed
14.7 PPR points on 28.1 expected · 0 TD on 0.0 expected
19 of 74 targets (26%) · 0 red-zone looks · 96% of snaps · drafted Rd 7
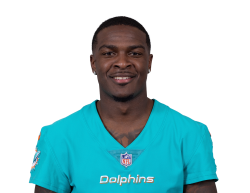
De'Von AchaneRBMIAIRTouchdowns owed
22.9 PPR points on 35.9 expected · 0 TD on 1.3 expected
11 of 50 targets (22%) · 31 of 47 carries (66%) · 7 red-zone looks · 81% of snaps · drafted Rd 2

Xavier WorthyWRKCYards owed
18.3 PPR points on 30.3 expected · 1 TD on 1.8 expected
13 of 68 targets (19%) · 4 red-zone looks · 82% of snaps · drafted Rd 12

Tetairoa McMillanWRCARTouchdowns owed
25.6 PPR points on 37.6 expected · 0 TD on 1.8 expected
18 of 66 targets (27%) · 4 red-zone looks · 81% of snaps · drafted Rd 4

Colston LovelandTECHIYards owed
1.3 PPR points on 13.0 expected · 0 TD on 0.9 expected
5 of 56 targets (9%) · 2 red-zone looks · 87% of snaps · drafted Rd 4

Malik NabersWRNYGQTouchdowns owed
14.0 PPR points on 24.7 expected · 0 TD on 0.9 expected
13 of 61 targets (21%) · 2 red-zone looks · 62% of snaps · drafted Rd 3

Quentin JohnstonWRLACOYards owed
6.1 PPR points on 16.7 expected · 0 TD on 0.0 expected
11 of 53 targets (21%) · 1 of 53 carries (2%) · 0 red-zone looks · 80% of snaps · drafted Rd 10
Sell high: the points are ahead of the role
Davante Adams is the clearest sell. 45.1 points on a workload worth 26.4: 16 of 57 targets (28%) and 2 touchdowns where the red-zone work says 0.5. None of that means he's bad. It means his next few weeks probably look a lot less like his last two, and right now someone in your league is pricing him off the last two.
5 of the 8 below are here mostly because of touchdowns. Those are the easiest sells, because the manager across from you counts the touchdowns and not the looks. The rest have been more efficient per touch than the position usually allows, which can be real, but rarely holds at this pace.

Davante AdamsWRLARHot per touch
45.1 PPR points on 26.4 expected · 2 TD on 0.5 expected
16 of 57 targets (28%) · 1 red-zone look · 59% of snaps · drafted Rd 5

Dalton KincaidTEBUFHot per touch
40.5 PPR points on 23.4 expected · 1 TD on 0.5 expected
14 of 56 targets (25%) · 1 red-zone look · 69% of snaps · drafted Rd 8

Chuba HubbardRBCARTouchdown-fueled
38.1 PPR points on 24.0 expected · 3 TD on 1.3 expected
5 of 66 targets (8%) · 22 of 44 carries (50%) · 7 red-zone looks · 68% of snaps · drafted Rd 7

D'Andre SwiftRBCHITouchdown-fueled
45.3 PPR points on 32.7 expected · 3 TD on 1.7 expected
6 of 56 targets (11%) · 34 of 70 carries (49%) · 9 red-zone looks · 62% of snaps · drafted Rd 5

Jakobi MeyersWRJAXTouchdown-fueled
16.0 PPR points on 4.8 expected · 1 TD on 0.0 expected
3 of 49 targets (6%) · 1 of 56 carries (2%) · 0 red-zone looks · 78% of snaps · drafted Rd 11

Christian WatsonWRGBTouchdown-fueled
46.8 PPR points on 36.4 expected · 3 TD on 1.4 expected
19 of 69 targets (28%) · 3 red-zone looks · 83% of snaps · drafted Rd 6

Kyle MonangaiRBCHIOHot per touch
28.2 PPR points on 18.4 expected · 1 TD on 0.8 expected
4 of 56 targets (7%) · 20 of 70 carries (29%) · 4 red-zone looks · 38% of snaps · drafted Rd 9

Parker WashingtonWRJAXTouchdown-fueled
36.1 PPR points on 26.6 expected · 1 TD on 0.0 expected
18 of 49 targets (37%) · 0 red-zone looks · 72% of snaps · drafted Rd 7
Also running ahead of their workload, and not on the list on purpose: Jaxon Smith-Njigba, Derrick Henry, CeeDee Lamb, Chris Olave, Jonathan Taylor, Justin Jefferson, Bijan Robinson, Amon-Ra St. Brown, Kyren Williams, Jahmyr Gibbs. All 10 went in the first three rounds. You drafted them to be the reason you win, the price already assumes big weeks, and two games of good luck doesn't give you anything extra to sell.
Before you hit send
Two games is a small sample, and this is a nudge, not a verdict. The model knows how often a player was targeted and handed the ball. It doesn't know who's healthy, who's covering him, or whether a new coordinator is still figuring out his offense. And no free feed publishes routes run, so snap share is standing in for route participation.
The way to use this: buy the names at the top of the first list from managers who are frustrated with them, and shop the names on the second to managers who think the hot start is who they are. Don't do either for a discount. If the other side won't pay, holding is fine. The whole point is that the role is the part you can count on.
Run an offer through the trade analyzer · Week 2 usage risers · The live waiver board
Put this to work on your Yahoo team
Connect your Yahoo Fantasy league and we’ll score your real roster with the Clutch Score, set this week’s optimal lineup and show the start/sit moves to get there. Read-only access, and you can disconnect at any time.
Targets, carries, red-zone opportunities and snaps from Sleeper's Weeks 1 and 2 stat lines, captured once each week was final, with shares measured against each player's own team totals. Expected points price each opportunity at the league-wide rate for that position over the same weeks, so across every player at a position the gaps sum to zero. A player who missed a game his team played is left out, so every row covers the full window; a bye does not count against him. Roster share is frozen with the latest capture. ADP and injury designations are live. Fantasy points are full PPR on Sleeper's scoring.